

Hallowww there sexpots! Today's post is a wild and sexy one..like literally..It's all about sky high heels, leopard prints, the fiery red colour and classy gold and some pearlised jewellery. Yeah I liked making this cake as it was a chance for me to make something that I've long wanted to do, which was a stiletto heel.


Okay, so I started with some gumpaste and shaped the heel. I wanted to achieve a height that that would literally bend your feet till it was almost anatomically impossible and would impress even the most discerning fashionista out there.

Once I shaped the heel, I inserted a lollipop stick into the middle of the heel to straighten and steady the gum paste heel till it dried.

In the meantime, I cut out gum paste shapes of the front of the shoe and the ankle straps as well as the sole which is not shown here. I basically drew the required shapes on paper and traced it on the rolled fondant and the cut the shapes out.

Once the heel had dried, I attached the sole to the heel. Prior to attaching the sole to the heel, I dried the sole into shape by leaving it on a styrofoam which was cut to resemble the curve of the heel.

Here I attached the ankle strap and the toe strap with gum paste glue and let it dry. I made sure the straps stayed in position and kept it's shape by stuffing some soft tissue to hold it up.

After that I rolled out some red fondant to cut out the cushioned layer of the sole and made a bright red ribbon to be attached on the back of the ankle strap.

Here is how the ribbon looked like once attached.

And from behind ..

And the side.

While waiting for the shoe to dry completely, which took about a day, I rolled out some more red fondant to cover the cake board.

For the deco on the side of the cake, I used the Karen Davies brooch mold which I bought from the UK. Here I dusted some corn starch to prevent the fondant from sticking on the mold.

Then I rolled some white fondant..

..took it out from the mold and produced this.

Of course to enhance the shape of the brooch,I dusted some pearl dust..

to produce this.


I then dusted a little bit of gold dust to produce an even more realistic dimension to the brooch.

Now on to some paintwork. To create the leopard look on the cake, I used some metallic light gold food paint.
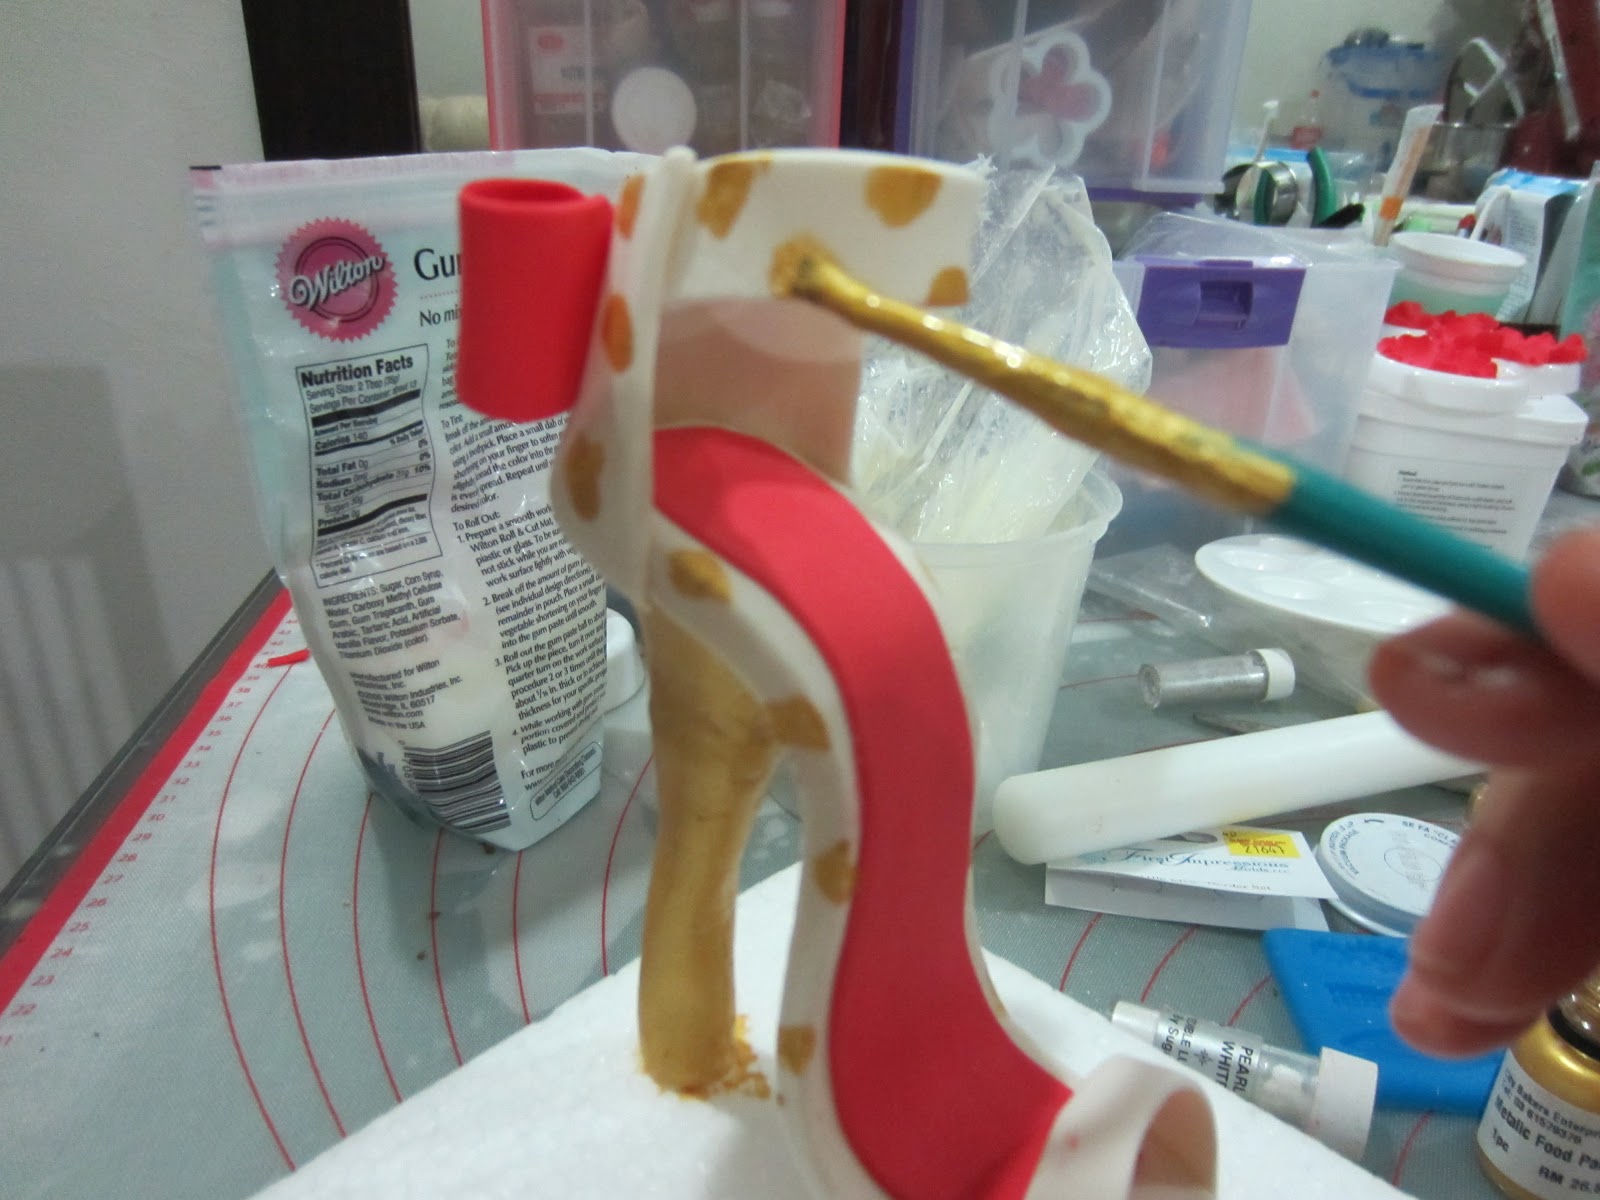
I painted some gold splotches on the shoe and let it dry.

In the meantime,I covered the chocolate cake with ganache..yumm yumm..

After I covered the cake with ivory colored fondant and covered the borders with some pearl fondant strips, I started painting on the cake itself. The prints didn't have to be all uniform in size and was randomly shaped to make the prints look more natural.

Next, after the gold paint had dried, I painted on some black food colouring surrounding the gold prints. Once that was done, I left it to dry a little.

Now for the red flower, I rolled out some red fondant and used various sized round scalloped cutters to cut out the flower shape.

Then I ruffled it with a dog bone tool.

Then I left it to dry on the flower formers before stacking and gluing them one on top of the other.

Then I made a dark center for the flower and stuck the flower on a red strip of fondant which was wrapped around the cake. I thought that looked so pretty.:)


This is where the cake got personalised. I spelt out the birthday girl's name on my alphabet imprinter and imprinted it on a strip of ivory fondant and stuck it on the middle of the sole of the shoe. How cute is that!

Sky high heels complimented by a fiery red flower!

View from the top.
Phewwwh! That was a lot of typing...haha..yup a pretty simple looking cake but a lot of work thrown into it. I loved that it demonstrated and represented so many techniques in cake decorating from gum paste construction, paintwork, mold work and sugar flowers.


So there you have it..a stylish cake for a stylish girl and her friends! Woohoo!
Lovely too good. The heels look so natural. Love you work
ReplyDelete