

Wow..I've been so busy lately that my blog posts have really been put on the backburner. I really need to get typing some! Today's post will be a lengthy one..it's another wedding cake series for a lovely couple named Edward and Jess. Theirs was a very personalised one and really symbolised their love for travel. ok with no further ado ..here's how I did it :)


The couple wanted figurines to resemble themselves so as usual this is the first thing that I did as this usually takes the longest time to make. As you can see here, I made the bride figurine using a plastic mold. Then I adjusted the facial features on the gumpaste mold by referring to the bride's pic. A day later, once the gumpaste has hardened a bit, I completed the facial features by painting on the eyes and adding some peach blush to the cheeks.


Once again using the mold, I shaped the bride's legs. I guess I could have made them by hand but this saves SOOO much time and really less hassle than usual :)


Now on to Mr. Groom. I used the same method as how I made the bride. The tricky part was getting the facial shape and other features right down to the mole!

The figurines takes at least 3 days to dry completely before I can dress them. While waiting I decided to make personalised cupcake wrappers.


The couple also wanted a bouquet of roses on top of the cake. So I made these using their theme colours, white, pink and lavender.

After the figurines had dried, it was time to dress them. First I had to put some hair. I molded some black fondant to cap it over the head.
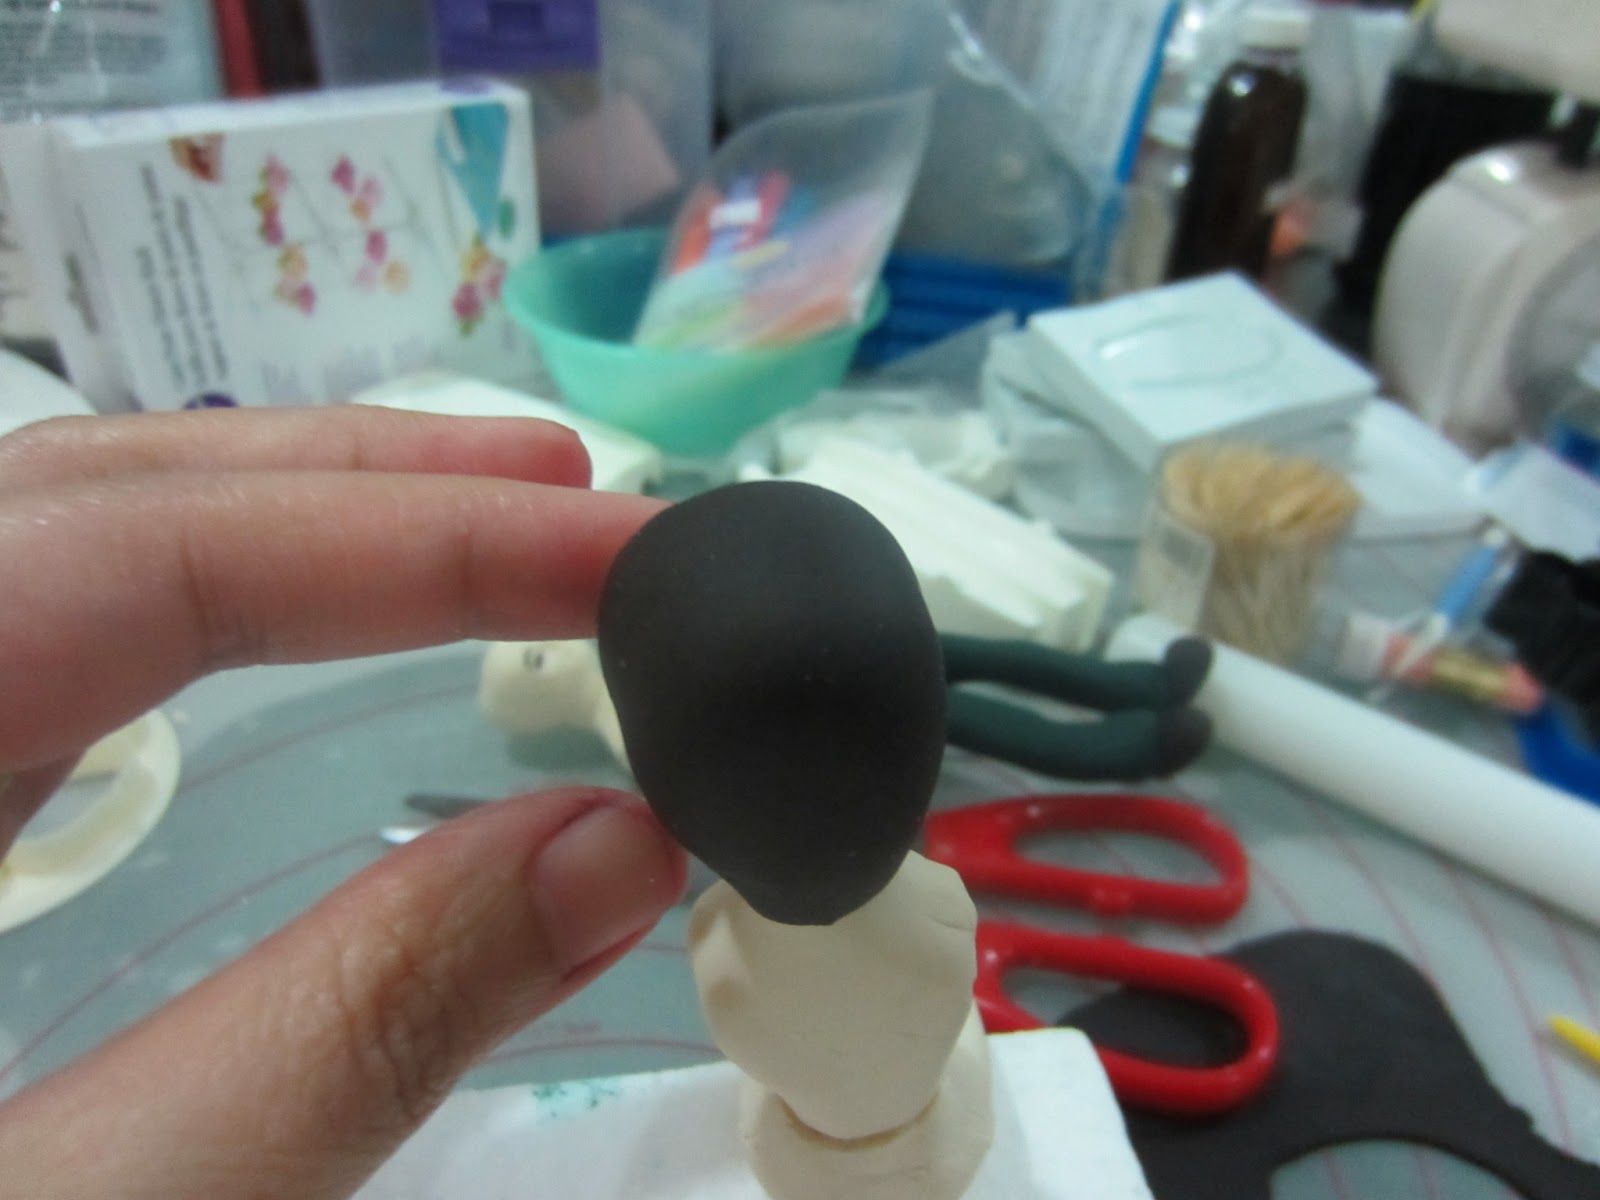
From there I shaped it over her head and then cut off any excess.

The bride was going to wear her hair up on her wedding day so I added a bun too and made some hair strands using a knife tool.

I also made a fringe and added 3 little swirly roses on top of her bun.

The bride's dress was also personalised and was made to resemble her real wedding dress. I made these white swirly gumpaste roses and stuck them one by one unto the sheet of white gumpaste that I wrapped around the figurine. This took several days to make.

For the groom, I made a blue vest and embossed it with a flowery embossing tool by Patchwork cutters.

I then wrapped a sheet of black gumpaste around the groom and cut it out to resemble a tuxedo.

Then I made the groom's hair too using the same technique as how I did the bride.
Lastly I added the extremities and again had the wait for the figurines to dry. All in all it took almost two weeks to finish these two masterpieces :)


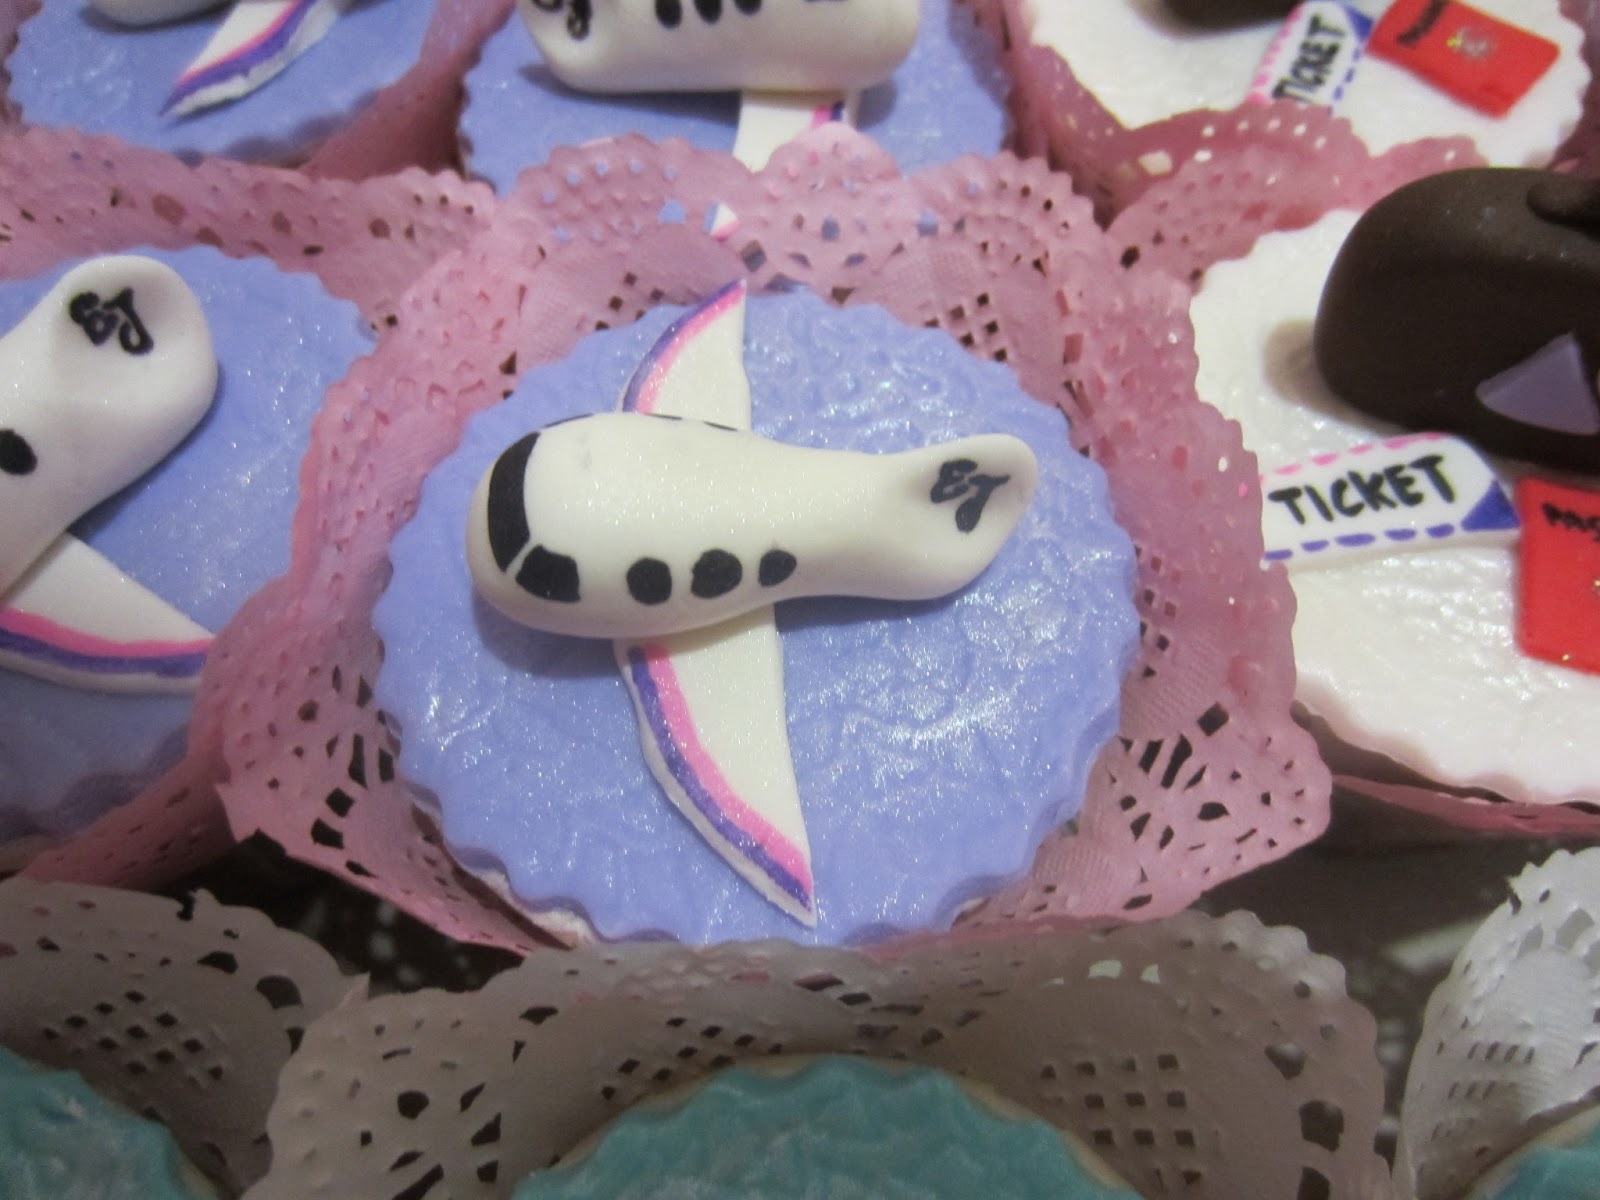
I don't like to waste time so I made the little airplanes that were to go on the cupcakes. Here you can see that I made the body of the plane first and later cut out the airplane wings to be glued underneath the body of the plane. I had to make 10 of these.


Then I had to make little brown suitcases using chocolate fondant and attached little handles to each of the 15 pieces that I had to make.

Again I had to wait for them to dry.

After that I added on some tiny details to the luggages using the theme colours and cut out travelling stickers which I glued on to each individually.

I finished up the details of the planes, added the couples initials and decorated it with the theme colours.

Next up I made 25 2D fondant cut outs of clouds of which I also put the couples initials using their wedding theme colours.

Here are the cupcake toppers all done. You can also see the couple's initials on the suitcases too.

Now on to the cake itself!! Here you can see how I designed the royal icing piping design which was to go on the side of the cake along with..yeah you guessed it...the couple's initials!!

Honestly my piping skills are not as smooth as I would like but I could easily correct it with a brush dipped in a little water.


This is how it looked like once the RI piping was done.

I thought it looked really pretty even though it wasn't perfect.

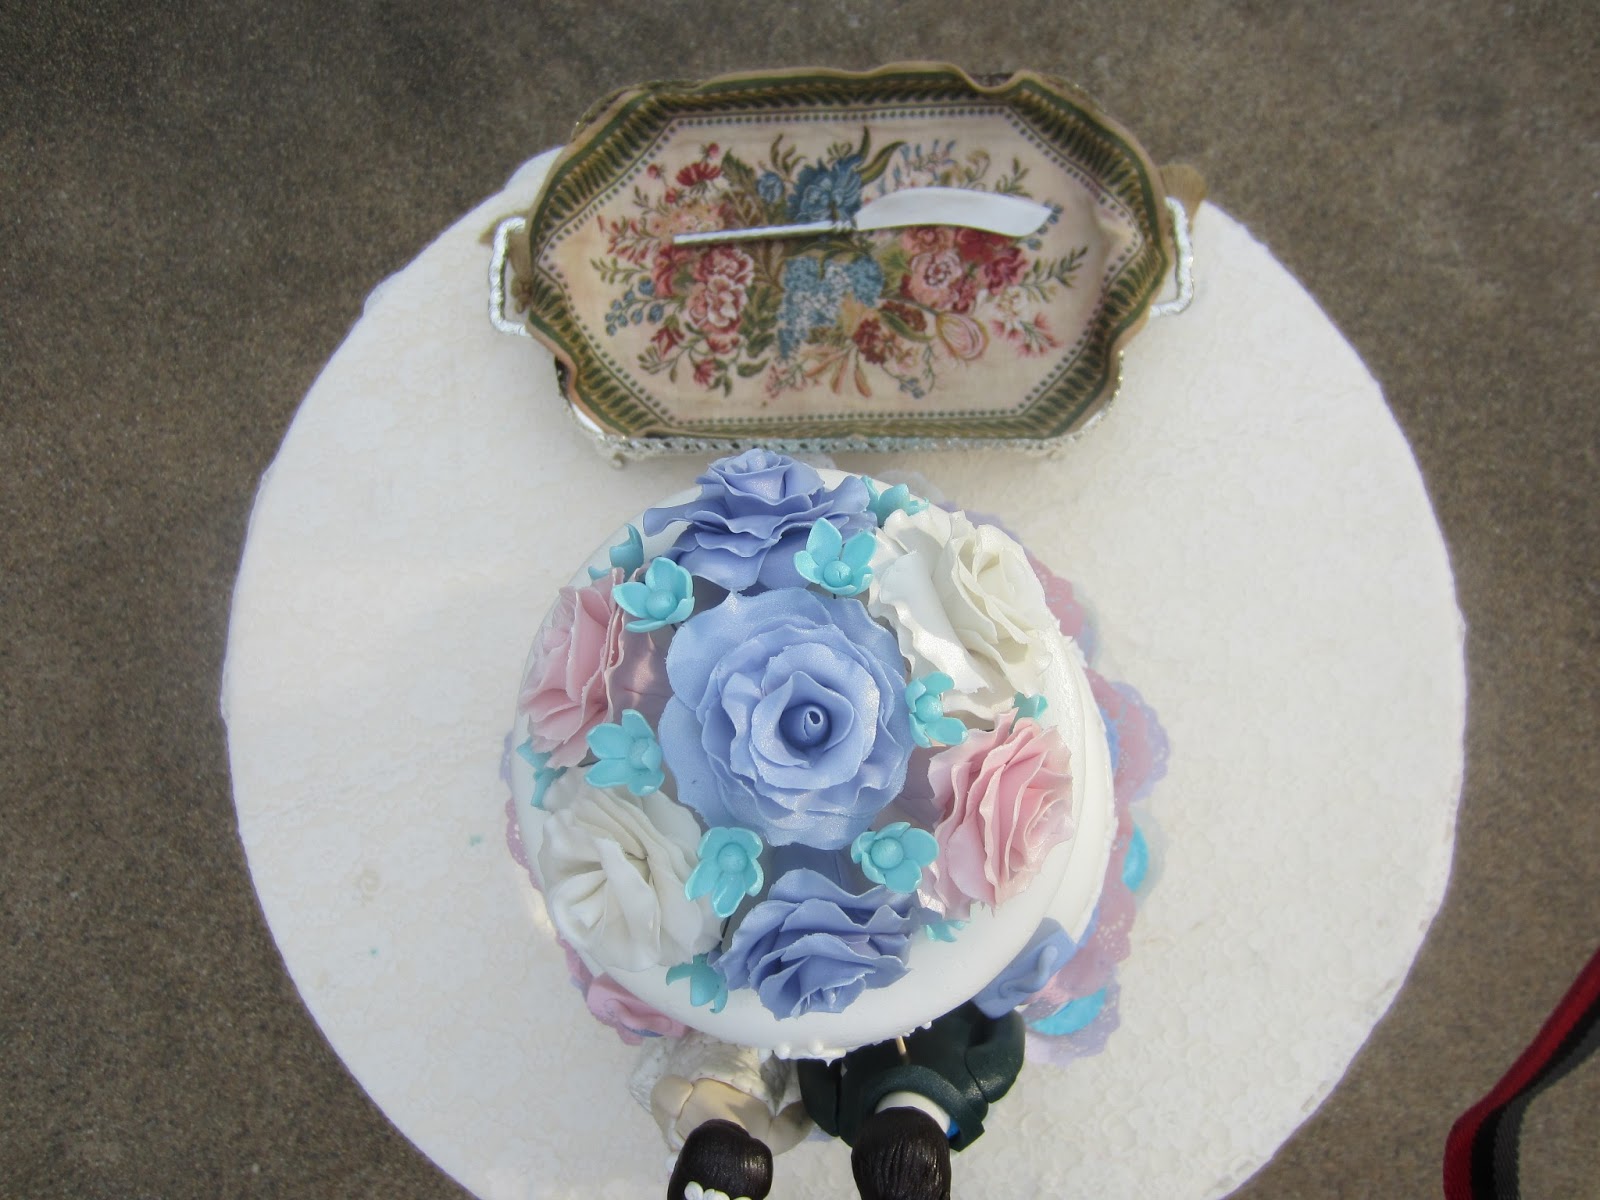
Lastly I put the whole cake together and that includes the bouquet of roses on top (to which I airbrushed a pearly sheen)...

...and the bride and groom figurines sitting on the second tier. As you can see the bride's dress was still not done at this point!

After the cupcakes were baked and cooled (they were mocha flavoured cupcakes by the way), I started to make the fondant covering which was supposed to cover them. First I imprinted a lacey design on top of the fondant to make it appear special and wedding-y and then I cut out 50 pieces of them using a scalloped round cutter.


Here I brushed each individual fondant topper with some pearl dust to give it a satinny sheen.

Next I made the bride and groom's suitcases. I added some edible glitter on top of their initials too.


Oh I also added little passports and airplane tickets next to the suitcases to add another personal touch to the cupcake toppers.

Here are the cupcakes all done!


The most nerve wrecking thing was transporting this cake all the way to Putrajaya. I swear I nearly had a heart attack haha..(well, this happens everytime I transport cakes anyway..heheh). However, when I reached the venue, it was a perfect setting for the cake so I was really glad.


Side and front views.

Top views.

Finally, a close up of this beautiful work of art. A personalised wedding cake fit for the king and queen of the day. Write to me at homemaydecakes@gmail.com if you want to order a similar personalised wedding cake for your most memorable day. Thanks for reading!