Hi all! After 2 years of rest from cakes, HMC is slowly opening up orders for cakes again. I will only accept one order per week instead of three, preferably 2-3 weeks in advance cos still busy with my kiddos so need time to complete figurines,flowers etc. Please email homemaydecakes@gmail.com to order ya! Thank you for your patience all these years.
Best regards,
May
The Making : Bloom Winx Club Cake

Heya folks! I'm honestly excited about today's post. It's one of my favourite work on cakes and it's a fairy cake! Bloom from the Winx Club fairy to be exact. Last year I swore off on figurines..but at last grew to love them especially on cakes such as this one. The main features of this cake are the wings which is made of gelatine and the upper half of the fairy body which is fully made of gum paste. So let's get right on it..:)


The first thing I needed to do was figure out how to make the wings. I did some research on the internet and youtube and found out that I can make wings out of gelatine. So here I diluted some gelatine with a little water and the the coloured some of it with some blue and pink colour gel paste.

Before that I drew a sketch of the wings that the client wanted.

Here I took a plastic projection sheet, put it on top of my sketch and proceeded to drop a little bit of diluted gelatine unto it and spread it with a toothpick. This process was repeated until the whole sketch design was completed. I took almost an hour or so doing one wing.

This is how it looked like once done.

I had to leave this to completely dry for about 2- 3 hours on the plastic sheet. Once dry, I lifted up the wings slowly and careful not to tear the fragile gelatine sheet. That required a lot of patience on my part!

Okay so here you see my figurine.. okay okay I know what you are thinking.. the boobs are too big..the Winx fairies don't really look like that :)..but there's a reason for those ample bosoms...I'll tell you later heheh..Anyway I put toothpicks in the shoulders and propped it up on my sugar beads containers until it dried into shape..this took several days.

Once dried, I started painting the facial features.

Lovely blue eyes..

Outlined the eyes with some black colour and some pink eyeshadow. All this detailed painting made me resolve to buy some fine brushes for my figurine next project. It was hard to get it really tidy with a normal brush. All colours were mixed with a bit of clear vanilla flavouring to thin the gel colour paste.

Added a little disco dust to the eyeshadow..

Here I did the lashes..

..and a few white dots on the black of the eyes..to add some sparkle to them..:)


Some peach blush on the cheeks too!

Here I made some orangey hair for her..and the face was practically done.

Then I covered her body with some blue fondant and stuck on some glitter dust to make the top stand out. I was beginning to love her a lot..:)

This cake you see here is the base on which the fairy cake will stand on.

This here is her 'gown'. The cake was a moist butter cake layered and filled with blueberry jam and buttercream..yumm..

Then I covered it with a blue fondant base.


Then I stuck on layer upon layer of blue frilly fondant strips...making folds so that it will look like a flowy gown..

Made some purple frills to add to her bust.

Completed the look with some more details.

So here's where the boobs came in handy. I made her arms and rested them on them jugs until they dried. I think this post has the most mention of boobs compared to all my other posts. :P Kinda funny...

I used a cookie pop stick to hold up her torso..

Here I stuck her torso into the top of the gown skirt to finish the whole look.

Added some pink glitter to the pink part of the gown..I basically used a nice picture of Bloom as a guide on how to make her whole look.

It was time to add on the wings and I was excited to see how this would finally look. First I glued on some pink gum paste on her back and stuck the wings on either side. I didn't mind that it looked a bit funny with that blob of gum paste on the back because that will soon be covered with more hair. LOOOOVED IT!

I took a white styrofoam block and put it behind the wings to show you that it was see through. I also loved that it was shiny and fluterred in the wind...like a real fairy wing..well ..'real' as in like in my fantasy world of big boobied fairies...okayy..that didn't sound right..hmm..

Anywhooo..I added her fringe..

This is one way of making hair..just cutting of strips of fondant and lining the 'hair' details with a tool.

Glued them on her head covering that pink fondant blob on her back...added some highlights too.

Ahh..I just fell in love with her.. she's a beaute..

Her finished hair with some purple and pink roses on top.

The lovely birthday message..

Ms. Bloom was looking gorgeous..

A long post but soooo worth it. So much detail and love went into this cake..which is usually the case with my cakes but I was particularly proud of this one. I was no longer scared of making figurines. I hope you guys enjoyed this post! See ya!!
The Making: Giant Cupcake in buttercream

Giant cupcake! Yup that's what I'm gonna show you today. Honestly I don't do much buttercream cakes because I mostly get requested to make fondant covered cakes, so on the rarity that I do get an order like this, I get kinda nervous. First of all, buttercream well..it's tricky..You've got to get the right consistency to produce the effect that you want. Second of all, you've got to get the right flavour according to your clients needs. There are many types of buttercream. There's American buttercream, Swiss meringue buttercream, Italian buttercream etc...hmm how come there's no Malaysian buttercream? Perhaps I should invent one. :) Anyway different buttercreams offer different levels of sweetness and texture. Most Malaysians don't like their cakes too sweet but in our humid and hot weather, they also would like if their cakes don't melt as easily.
Now like I said this is tricky. In order for buttercream to hold up a design, it needs quite a lot of powdered sugar in it and American buttercream seems to be the best choice in this case. That being said, the frosting then can end up being quite sweet. So when a customer says to me, "I don't want the frosting to be too sweet", I really have to scratch my head. (not this customer la but most of them). The only thing I can end up saying is that I can only adjust the sweetness in the cake itself. The only way I can cut down the sweetness in the frosting is by adding a bit of salt. Otherwise it is impossible to pipe. Otherwise I would suggest Swiss meringue buttercream, which is pipable but will not hold up well in hot weather. Well, you win some, you lose some.:) Aaaanyway let's start then..

Okay so giant cupcake. I really didn't have a mold for this so I went and bought this beauty. It's made of sillicone so it was pretty easy to get the cake out.


I then made some American buttercream which is basically made of powdered sugar and butter of course. I just added a little shortening to make sure that it was more stable and pipable in order to hold the shape of the rosettes. Of course a little salt to cut down the sweetness. Then I slathered the buttercream on the cake to form a crumbcoat and another layer to make it pretty. Here's the thing, and another reason why buttercream irks me a bit...being the perfectionist that I am, I will take AGES just doing this initial step. I see a dent and I get all flustered and want to smooth it over and over again. In other words, I find buttercream cakes are much harder than fondant at times..(okay MOST of the time).

Anyway, once I finally got that done. I practiced my rosettes. I mixed one part of the buttercream with some peach gel coloring.Then I put half of each the colored and non colored into a piping bag complete with 1M tip. Pressed and swirled it from the middle to outwards until I got the size that I wanted.

Once I was satisfied with the rosette that came out, I was ready to attack the giant cupcake wooooooOoo!

So I forgot to take step by step pics on how I arranged the rosettes on the giant cupcake.But here you can see the little star buttercream borders that I piped.


And here you can see how I piped the rosettes on the cupcakes itself. I made 3 colours, peach, maroon and natural buttercream

Here is a view of the cake from above.

...and from the side.
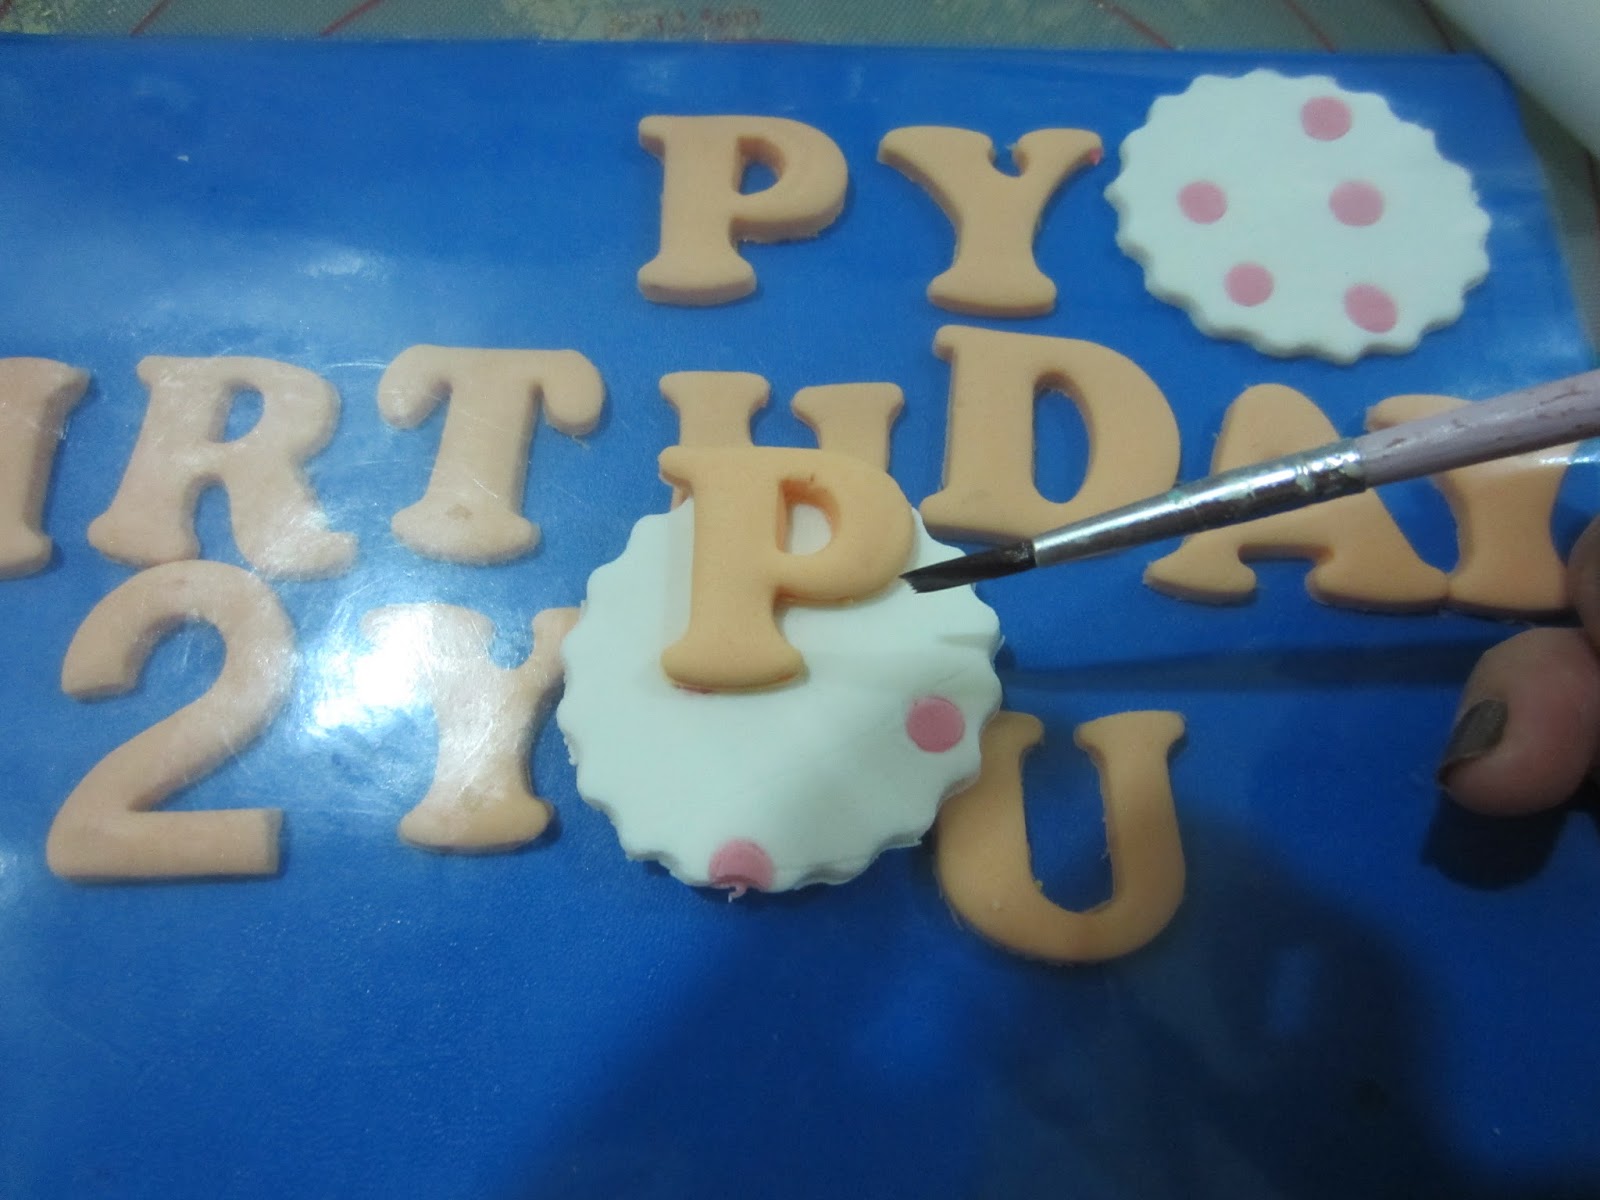
I made the cut out messages and put it on a fondant cut out decorated with pink polka dots.

..laid them on the cupcakes..

Then I made these twizzlers ( yeah I made that word up) a string of pink and a string of peach..

..then you 'twizzle' them together..

Here are my polkadot fondant butterflies drying into shape


More views of the cake..

Then I brushed some pearl lustre on to the alphabets..

...and also on the butterflies..

By the way, I made the board myself. I got some matching wrapping paper and covered the board with it and covered it again with a sticky plastic sheet. It really made the cake come all together. Giant buttercream cupcake was a success! Toodeloo folks!
Subscribe to:
Posts (Atom)