The Making : Hello Kitty Cake

Miaow!! Hello Kitty! I've finally been commissioned to make this all time favourite cartoon character for a very lucky 3 year old girl named Isabelle.
As usual, I prepared the board. To make it extra special I added on some pink edible glitter on it.

The cake flavour was not on my cake list but it was a macadamia nut cake with raspberry jam filling and covered with white chocolate ganache...yumm..I wish I had a chance to see it once it was cut.

Client wanted a bow around the bottom so that's exactly what I did.
Then the birthday girl's name. I like that they only put her name down instead of the whole Happy Birthday.. message. I mean it seems logical that toddlers only recognise how the cake looks most of the time and not quite anything that's written on it.
Then I attached the yellow button nose and the pink bow.
The pink bow was kinda tricky. I had to follow the cartoon exactly as the client didn't want an actual 'bow' bow on the head. So I made it as close as possible to the character's bow and added some glitter to the middle to tie in with the glitter on the board.
Okay I had some problems with my air brush machine today so I opted for the Wilton's Color Mist food color spray in pearl white. Worked the same and never dissapoints :)
The I cut out the eyes and whiskers with black chocolate fondant.
Added two tiny flowers flanking the birthday girl's name and I was done.
View from the front side. It was quite a thick cake at about 4 inches high. I baked three layers and 3 separate times in the Hello Kitty cake pan.
A closer look at the name with flowers.
There you have it...a Hello Kitty cake! Okay..bye-bye for now Kitty....:)

Showcase: Simple butterfly and flower design on cake

Another simple post..This was an order which was passed down to me from another baker/decorator friend of mine. It was a garden themed cake with simple flowers and butterflies. This is what is called a cake with 2D deco. 2D meaning that the fondant cut outs are attached flat on the cake.
Here's the cake before it was decorated. It was a coconut cake with coconut mousse filling as requested by the client.

8 year olds love butterflies...
Different angles..

Top of cake embossed by patchwork cutters

Finally, purple gumpaste butterflies were attached to the top of the cake. Colors were all requested by the client..suits a little girl's taste..pretty and sweet!

Showcase: Cheeky Hen's Nite cupcakes

Hi all! Today we are gonna get a little frisky. Children please look at some other entry. This ain't for you pups. You'd probably wouldn't get it anyway..haha.. Adults...behold! 


Above: Lovely cuppies baking away!
Red velvet moist cupcakes ready to be decorated.
I always do cupcakes fondant deco waaayyy before I bake. I only bake the cupcakes fresh on the day before that is supposed to be picked up as cupcakes don't last too long.
I won't describe too much on the details. I think it's pretty self explanatory. heheh. Some a bit too graphic perhaps...LOL!
I had fun making these. Definitely had a chuckle or two and tried to imagine the faces of the ladies who were going to eat them ;D. I hope they had fun and a good laugh too!

Showcase : Manchester United Shirt Cake

Hi all! Another short entry. I wish I had taken more pics of the steps but I was quite rushed due to frequent calls. If there's one thing that's very important for clients to remember, is that you must TRUST me. I'm not gonna run away with your cake. I don't even want to be stuck with a cake I don't want. When I do work, I need peace and quiet. I'm an artist (aisehh..) and cannot be rushed. ;P 

Cute message.
This happens often in my line of work. Although, I do understand that when clients order online,there are risks. You don't know me, I sure as hell don't know you, right? hehe.  It's easy to feel panicky when I don't answer your calls. (that's why I ask you to message or email only). I mean, it's hard picking up the phone when your hands are so busy. Don't worry, I'm not mad. I just hope that future clients will understand. I'll probably write a post about what actually happens from when you start to order to the description of the time frame on how a cake is done to delivery or pick up. It's all about learning what I do really.

Front view.
Yup.. an original design made by the lady who ordered it for this lucky guy you see below! :)

He looks happy.. What a lovely surprise gift..:)

Mashimaro Cupcakes

Hi all, this is a simple entry on how I did the Mashimaro cupcakes. I really don't have much time to write on my blog nowadays since I'm quite occupied with orders but I do try when I can :)

So here the fondant message and tiny flowers are cut out and dried first.

Then the figurines are shaped and dried.

Here you can see one figurine with a dog cap..
One with an egg...
One with a plunger stuck on his head..(I don't know why??)

And a sweet one with a pink flower..
That's it..short and simple but oh so cute!

Back to Business!

Announcement, orders are now open again for events on the 30th and 31st March onwards. However I will not be taking in orders for the week of 22nd to 28th April 2013. Thanks all!

The Making: Stilletto shoes and Leopard Print Birthday Cake!

Hallowww there sexpots! Today's post is a wild and sexy one..like literally..It's all about sky high heels, leopard prints, the fiery red colour and classy gold and some pearlised jewellery. Yeah I liked making this cake as it was a chance for me to make something that I've long wanted to do, which was a stiletto heel.
Okay, so I started with some gumpaste and shaped the heel. I wanted to achieve a height that that would literally bend your feet till it was almost anatomically impossible and would impress even the most discerning fashionista out there.
Once I shaped the heel, I inserted a lollipop stick into the middle of the heel to straighten and steady the gum paste heel till it dried. 

In the meantime, I cut out gum paste shapes of the front of the shoe and the ankle straps as well as the sole which is not shown here. I basically drew the required shapes on paper and traced it on the rolled fondant and the cut the shapes out.


Once the heel had dried, I attached the sole to the heel. Prior to attaching the sole to the heel, I dried the sole  into shape by leaving it on a styrofoam which was cut to resemble the curve of the heel.

Here I attached the ankle strap and the toe strap with gum paste glue and let it dry. I made sure the straps stayed in position and kept it's shape by stuffing some soft tissue to hold it up.

After that I rolled out some red fondant to cut out the cushioned layer of the sole and made a bright red ribbon to be attached on the back of the ankle strap.
Here is how the ribbon looked like once attached.

And from behind ..
And the side.

While waiting for the shoe to dry completely, which took about a day, I rolled out some more red fondant to cover the cake board.

For the deco on the side of the cake, I used the Karen Davies brooch mold which I bought from the UK. Here I dusted some corn starch to prevent the fondant from sticking on the mold.

Then I rolled some white fondant..
..took it out from the mold and produced this. 

Of course to enhance the shape of the brooch,I dusted some pearl dust..
to produce this.
I then dusted a little bit of gold dust to produce an even more realistic dimension to the brooch.

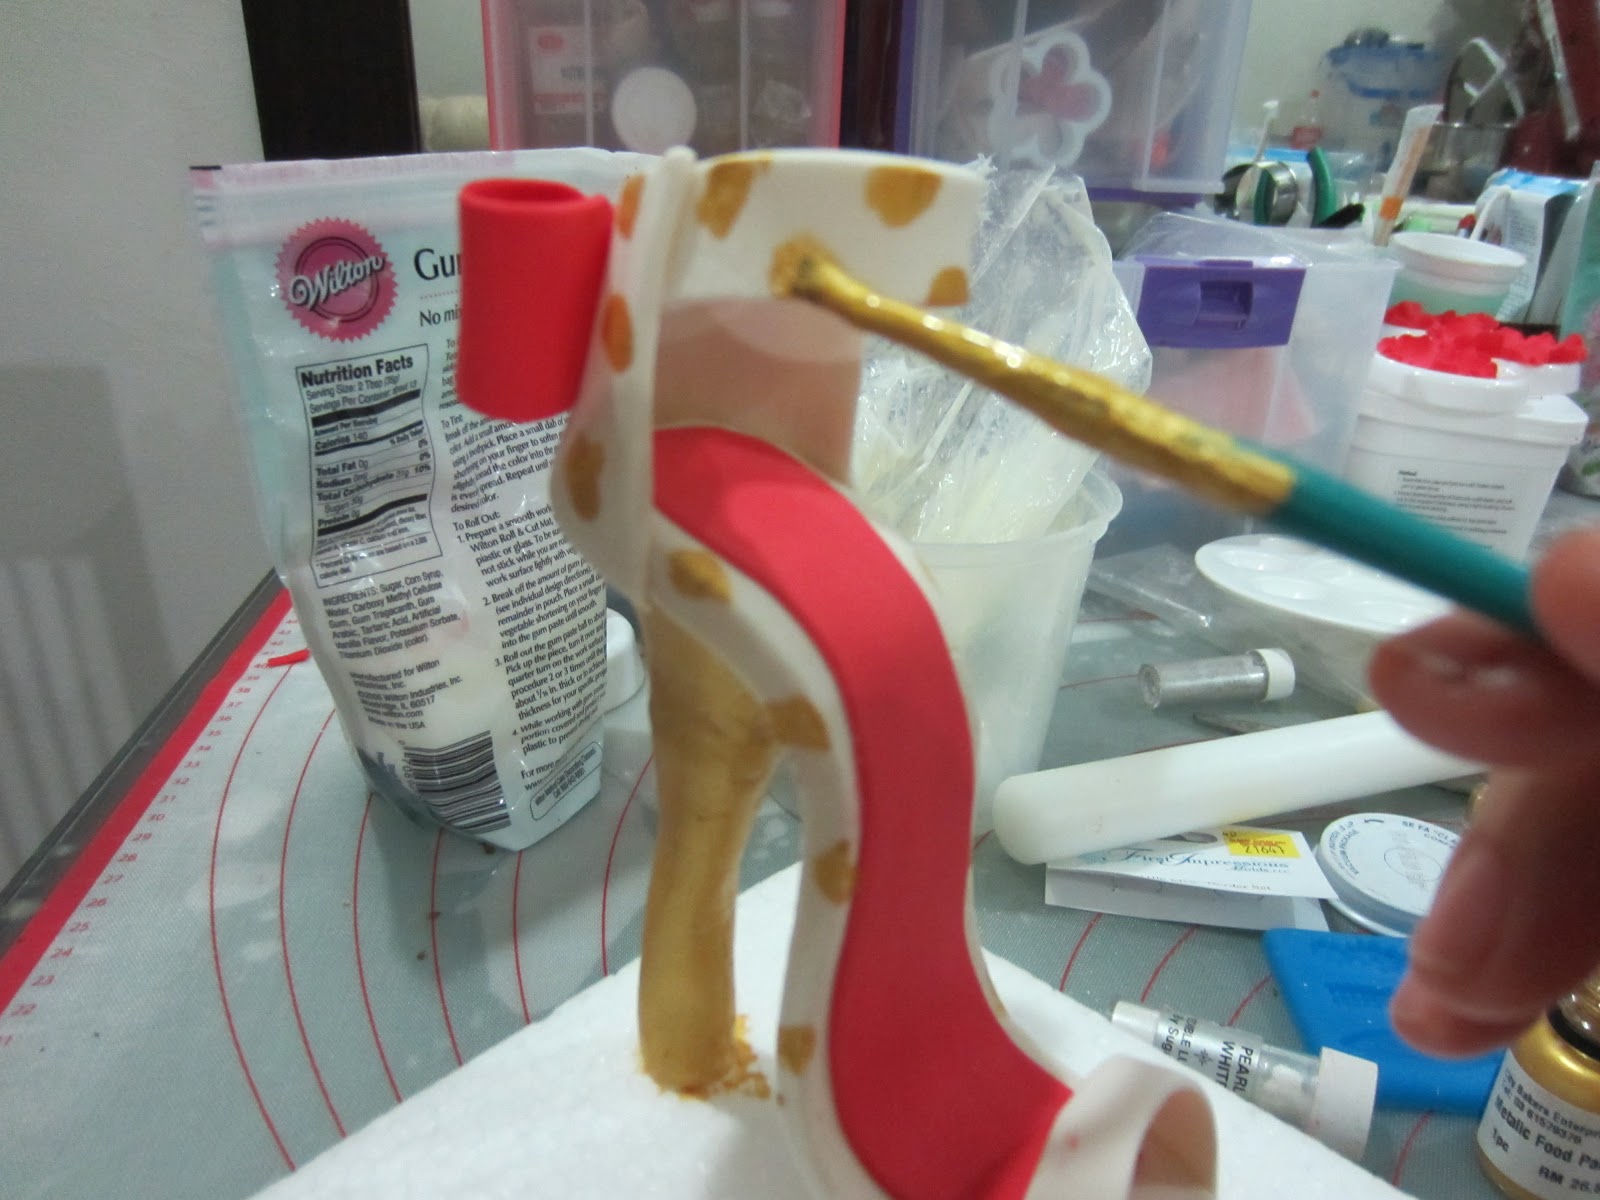
Now on to some paintwork. To create the leopard look on the cake, I used some metallic light gold food paint.

I painted some gold splotches on the shoe and let it dry.
In the meantime,I covered the chocolate cake with ganache..yumm yumm..

After I covered the cake with ivory colored fondant and covered the borders with some pearl fondant strips,  I started painting on the cake itself. The prints didn't have to be all uniform in size and was randomly shaped to make the prints look more natural.

Next, after the gold paint had dried, I painted on some black food colouring surrounding the gold prints. Once that was done, I left it to dry a little.

Now for the red flower, I rolled out some red fondant and used various sized round scalloped cutters to cut out the flower shape.
Then I ruffled it with a dog bone tool.

Then I left it to dry on the flower formers before stacking and gluing them one on top of the other.


Then I made a dark center for the flower and stuck the flower on a red strip of fondant which was wrapped around the cake. I thought that looked so pretty.:)

This is where the cake got personalised. I spelt out the birthday girl's name on my alphabet imprinter and imprinted it on a strip of ivory fondant and stuck it on the middle of the sole of the shoe. How cute is that!
Sky high heels complimented by a fiery red flower!
View from the top.
Phewwwh! That was a lot of typing...haha..yup a pretty simple looking cake but a lot of work thrown into it. I loved that it demonstrated and represented so many techniques in cake decorating from gum paste construction, paintwork, mold work and sugar flowers. 


So there you have it..a stylish cake for a stylish girl and her friends! Woohoo!